
Sick of ads on your home network? Here's a how to an installing a Pi-Hole on your home network.
First off, what's a Pi-Hole? Well, it's a network level ad and tracker blocking app. It acts as a DNS sinkhole and optionally as a DHCP server. It be can be installed on any Lunix machine (or Docker instance), but for this I installed it on a Raspberry Pi 4 I had sitting around waiting for a project.
Obviously you'll need a Raspberry Pi. You can see where I got mine as well as how to install an OS on the Pi. You can reference this article for a how to (you'll need to swap kali for Raspberry Pi OS though) https://otter-sec.com/how-to/ht_post/25/
Once that's done, it's time to install Pi-Hole which you can read all about here: https://Pi-hole.net/
I installed this setup on ATT fiber which I also use their Gateway that has some restrictions the normal how-to's don't work with. So here we are...
Install Pi-Hole using the following command:
curl -sSL https://install.Pi-hole.net | bashFrom their site: Piping to bash is controversial, as it prevents you from reading code that is about to run on your system. Therefore, we provide these alternative installation methods which allow code review before installation:The curl method is easiest. However if you'd rather you can clone their git repo and install that way or even download the installer and do it that way. If you'd rather do that here's their github: https://github.com/Pi-hole/Pi-hole/#one-step-automated-install. Pi-Hole is very well known, so for me the easy way was the way to go.
Once that starts up it'll open a GUI, just follow through the prompts. I've read some people will have an issue here and the installer will throw an error. If this happens configure your DNS resolver as:
sudo /etc/resolv.confnameserver 1.1.1.1
nameserver 1.0.0.1If your installer doesn't error, skip this part. You'll do it later in the setup but via GUI.
For the most part I went with the default choices for all of the following stuff.
Choose an Interface:
Mine will be hardwired so I went with eth0 here. Choose whichever is appropriate for your setup.
Select Upstream DNS Provider. To use your own, select Custom.
For this is chose Cloudfare. You can do your research here as they all have their pro's and con's. Cloudfare seemed to have the quickest results so I went with them.
Select Protocol. Filtering of both IPv4 and IPv6 is needed for Pi-hole to perform effectively, so leave both selected.
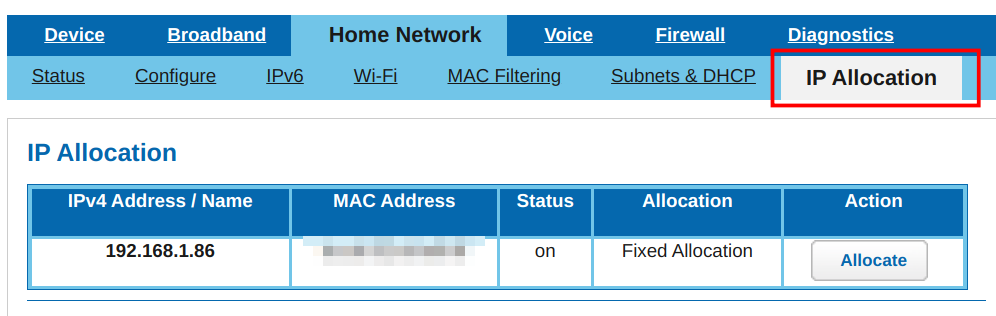
Next was Statis IP addresses. I made a mistake here and just hit yes. So this is how my instructions will go, we'll fix this later in the dashboard.
Do you wish to install the web admin interface? Choose yes for this
Next is Picking the privacy mode for FTL. You can read more about that here: https://docs.Pi-hole.net/ftldns/privacylevels/
I went with 0 as more data is always better. :)
Once this is done it will pop you out of the GUI and finishing installing. This part takes a bit so sit back and relax until it finishes up.
Next we need to log onto our ATT gateway and make some changes.
You should be able to navigate to your gateway/smarthome manager by typing the IP 192.168.1.254 into the browser and logging in. If not you can access via the app as well. You'll also need the code off the gateway. When you try to access the next section it'll popup a pic where to find it.
Once in head over to the Subnets&DHCP and turn off "DHCP Server Enable":
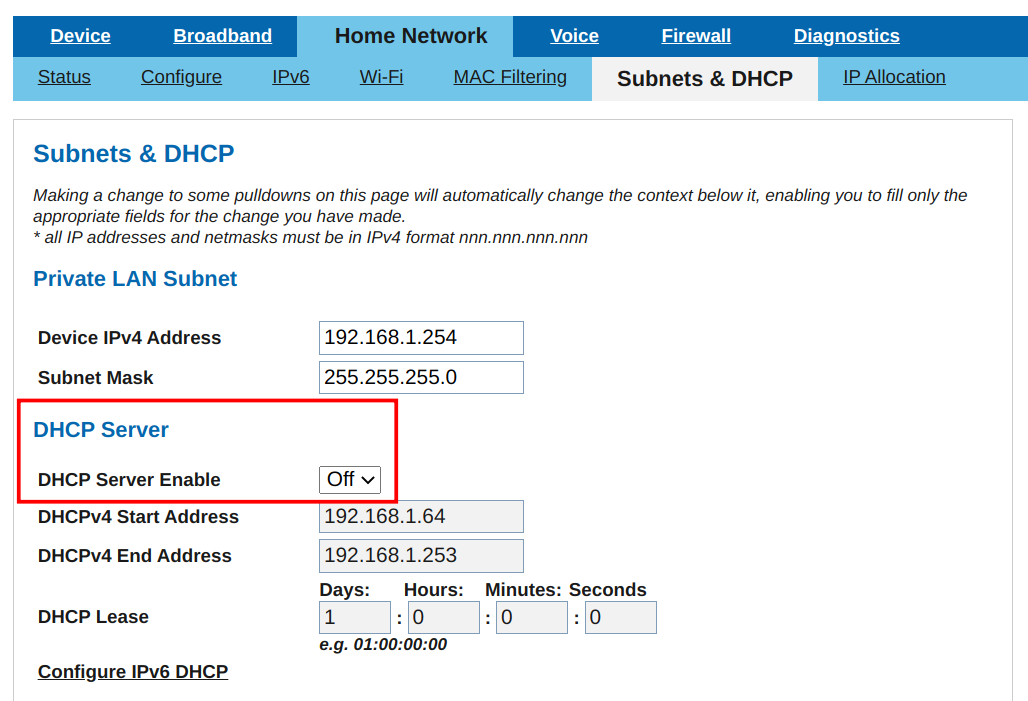
Set static IP of Pi (get from either setup on the static IP page of GUI or ifconfig/ip a command on Pi).
This completes the Gateway stuff, you can close this window.
Set static IP of Pi as well. Use whichever interface you are using. I am showing both here. Router is IP of your router/gateway.
Pi@RaspberryPi:~/Desktop$ cat /etc/dhcpcd.conf
interface eth0
        static ip_address=192.168.1.86/24
        static routers=192.168.1.254
        static domain_name_servers=1.1.1.1 1.0.0.1
interface wlan0
        static ip_address=192.168.1.86/24
        static routers=192.168.1.254
        static domain_name_servers=1.1.1.1 1.0.0.1
Nothing else on the Pi so you can close this as well (unless you are going to be working from it, otherwise just remove the peripherals and log in via your primary machine as explained later).
Next jump over to ATT's website (https://www.att.com/
Log in > account (top right) > profile. Scroll to the bottom and click Privacy. Click DNS Error Assist and move the switch to no. If you want while you are in there turn off External Marketing and Analytics.
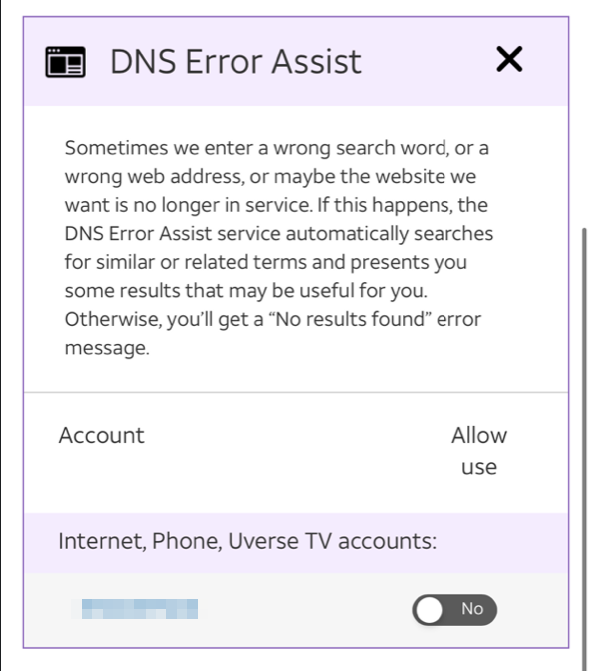
This concludes the ATT website part, you can close this now.
As now we should have made it through the GUI install, change our IP address on the Pi, made the Pi IP static as well as turned off DHCP both in the gateway.
The homestretch...
Log on to the Pi dashboard. This can be done via the Pi's IP or this url: http://pi.hole/admin/
Once there log in with the password you setup on the Pi.
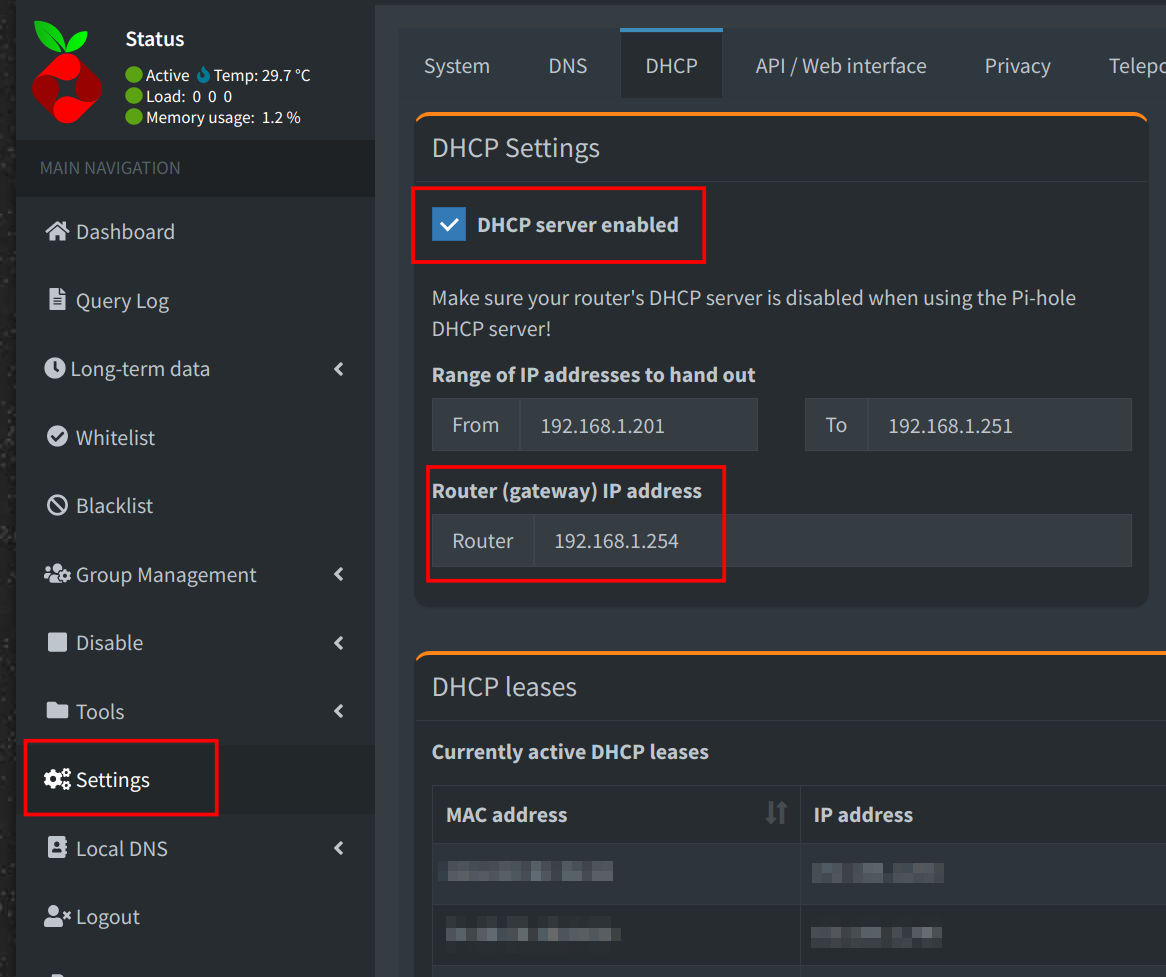
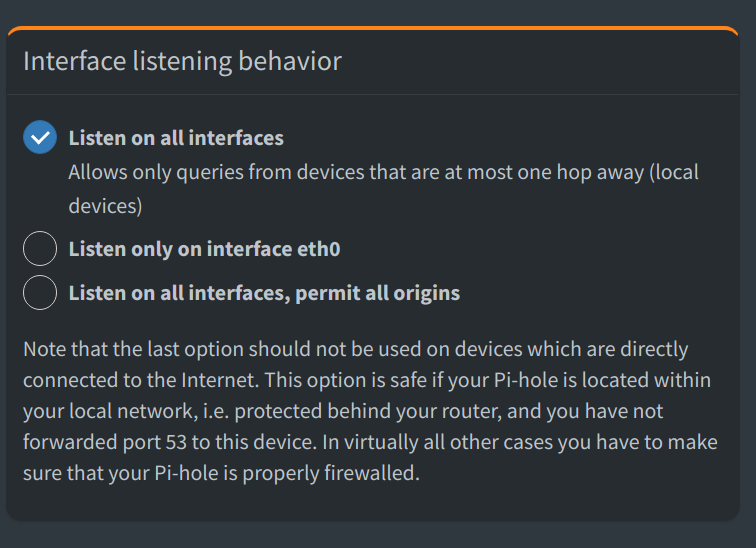
Last couple changes click on Settings > DHCP tab and check DHCP server anabled and change your gateway IP to the correct address assuming you did it wrong as I did above. In that same section click the DNS tab and change the Interface listening behavior to all (first option) if you aren't using eth0.
If you to save your eyes click API/Web interface and switch to dark mode.
That's it. It should be blocking ads now. Feel free to browse around the dashboard and look at all of the data, you can also whitelist and blacklist various domains if you feel the need.
I added these extra ad lists. Just paste this into the URL box.
http://sysctl.org/cameleon/hosts https://s3.amazonaws.com/lists.disconnect.me/simple_tracking.txt https://s3.amazonaws.com/lists.disconnect.me/simple_ad.txt
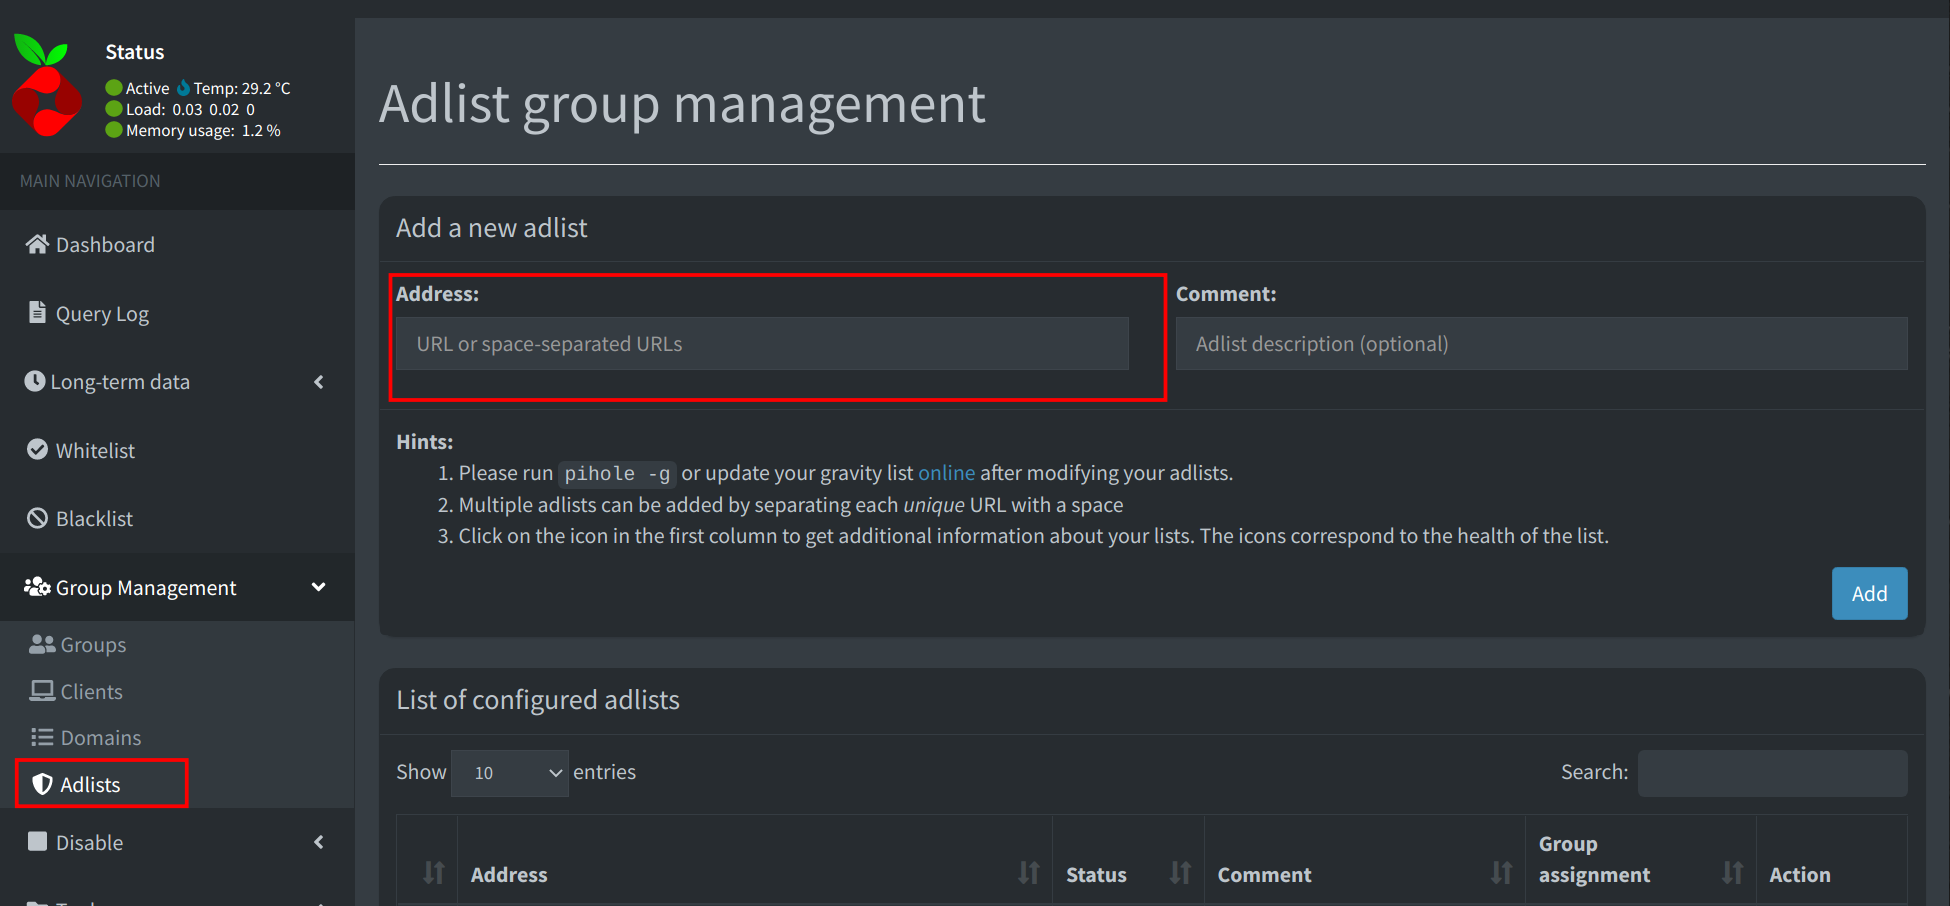
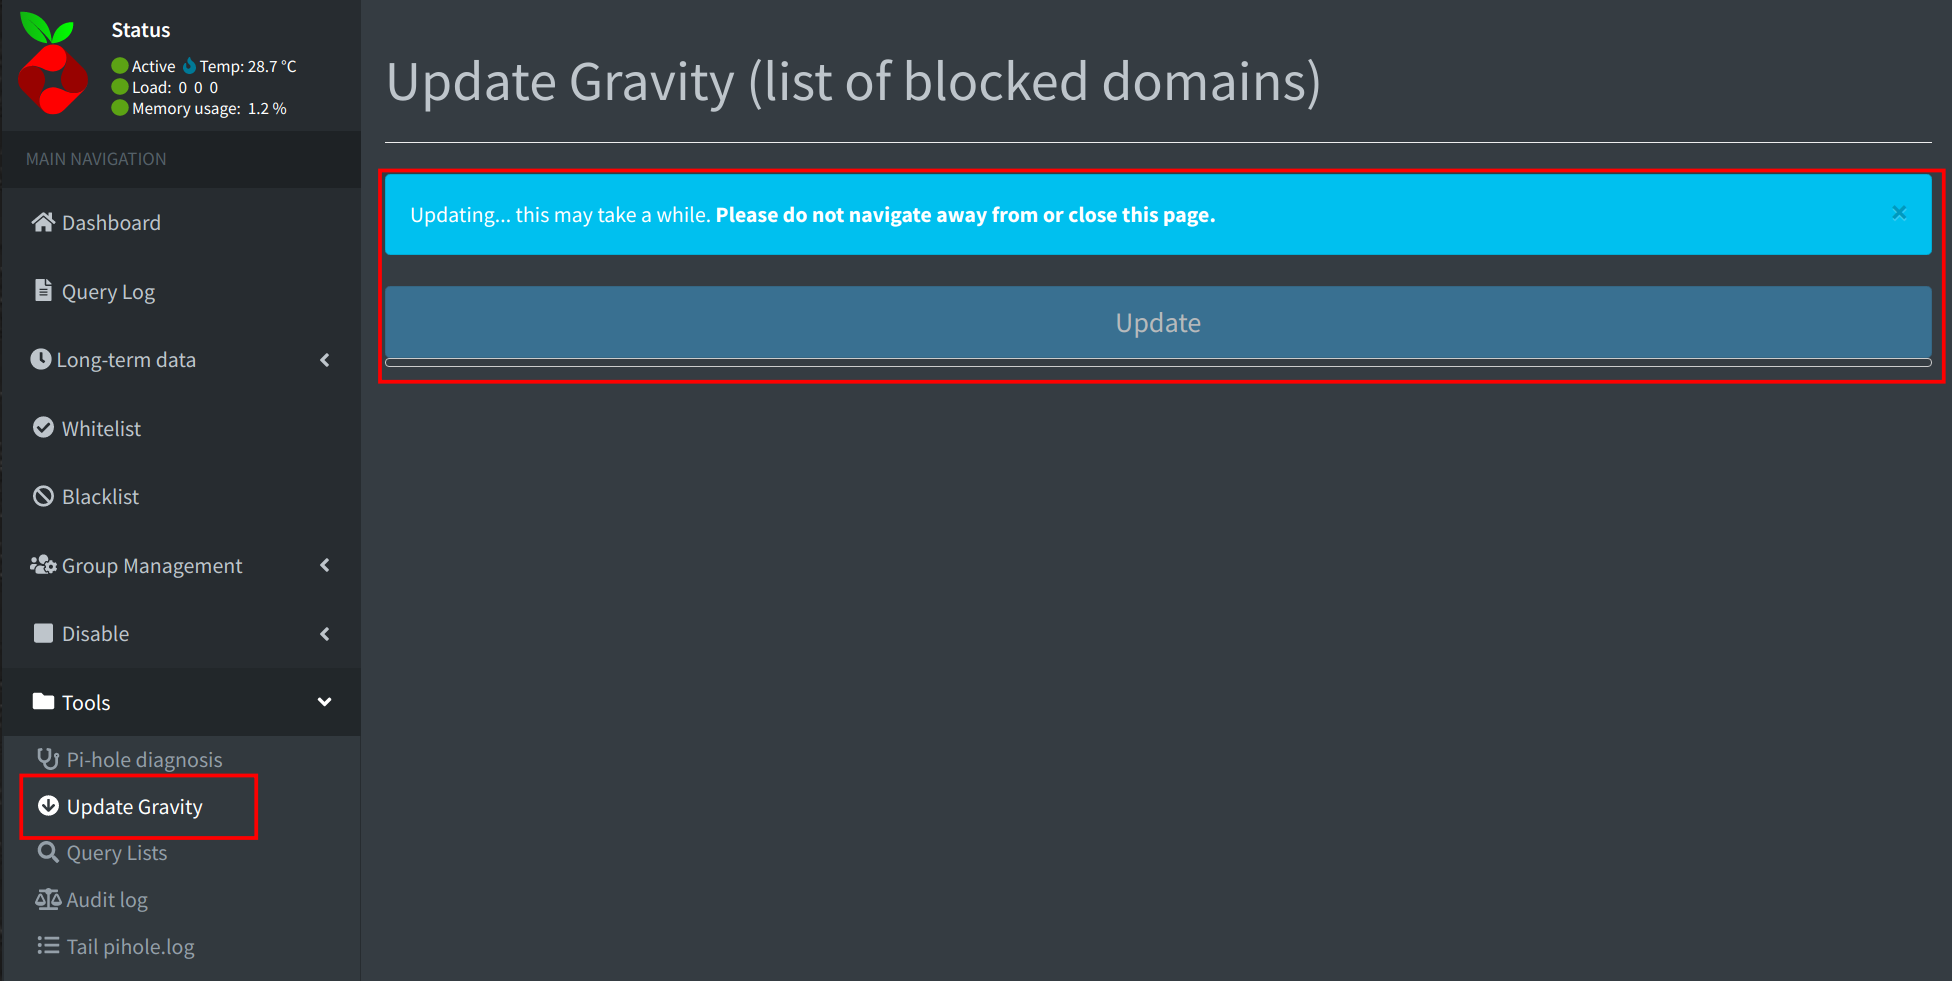
If you add the additional lists or not make sure to update the domain lists.
If you want to double check it's working you can do it via this method. Just replace your Pi's IP. If the second one returns 0's you are good. Otherwise if it's not working you can also run through the debug file and see if run into errors.
❯ host google.com 192.168.1.86
Using domain server:
Name: 192.168.1.86
Address: 192.168.1.86#53
Aliases:
google.com has address 172.217.5.110

❯ host pagead2.googlesyndication.com 192.168.1.86
Using domain server:
Name: 192.168.1.86
Address: 192.168.1.86#53
Aliases:
pagead2.googlesyndication.com has address 0.0.0.0
If the second one returns 0's you are good.
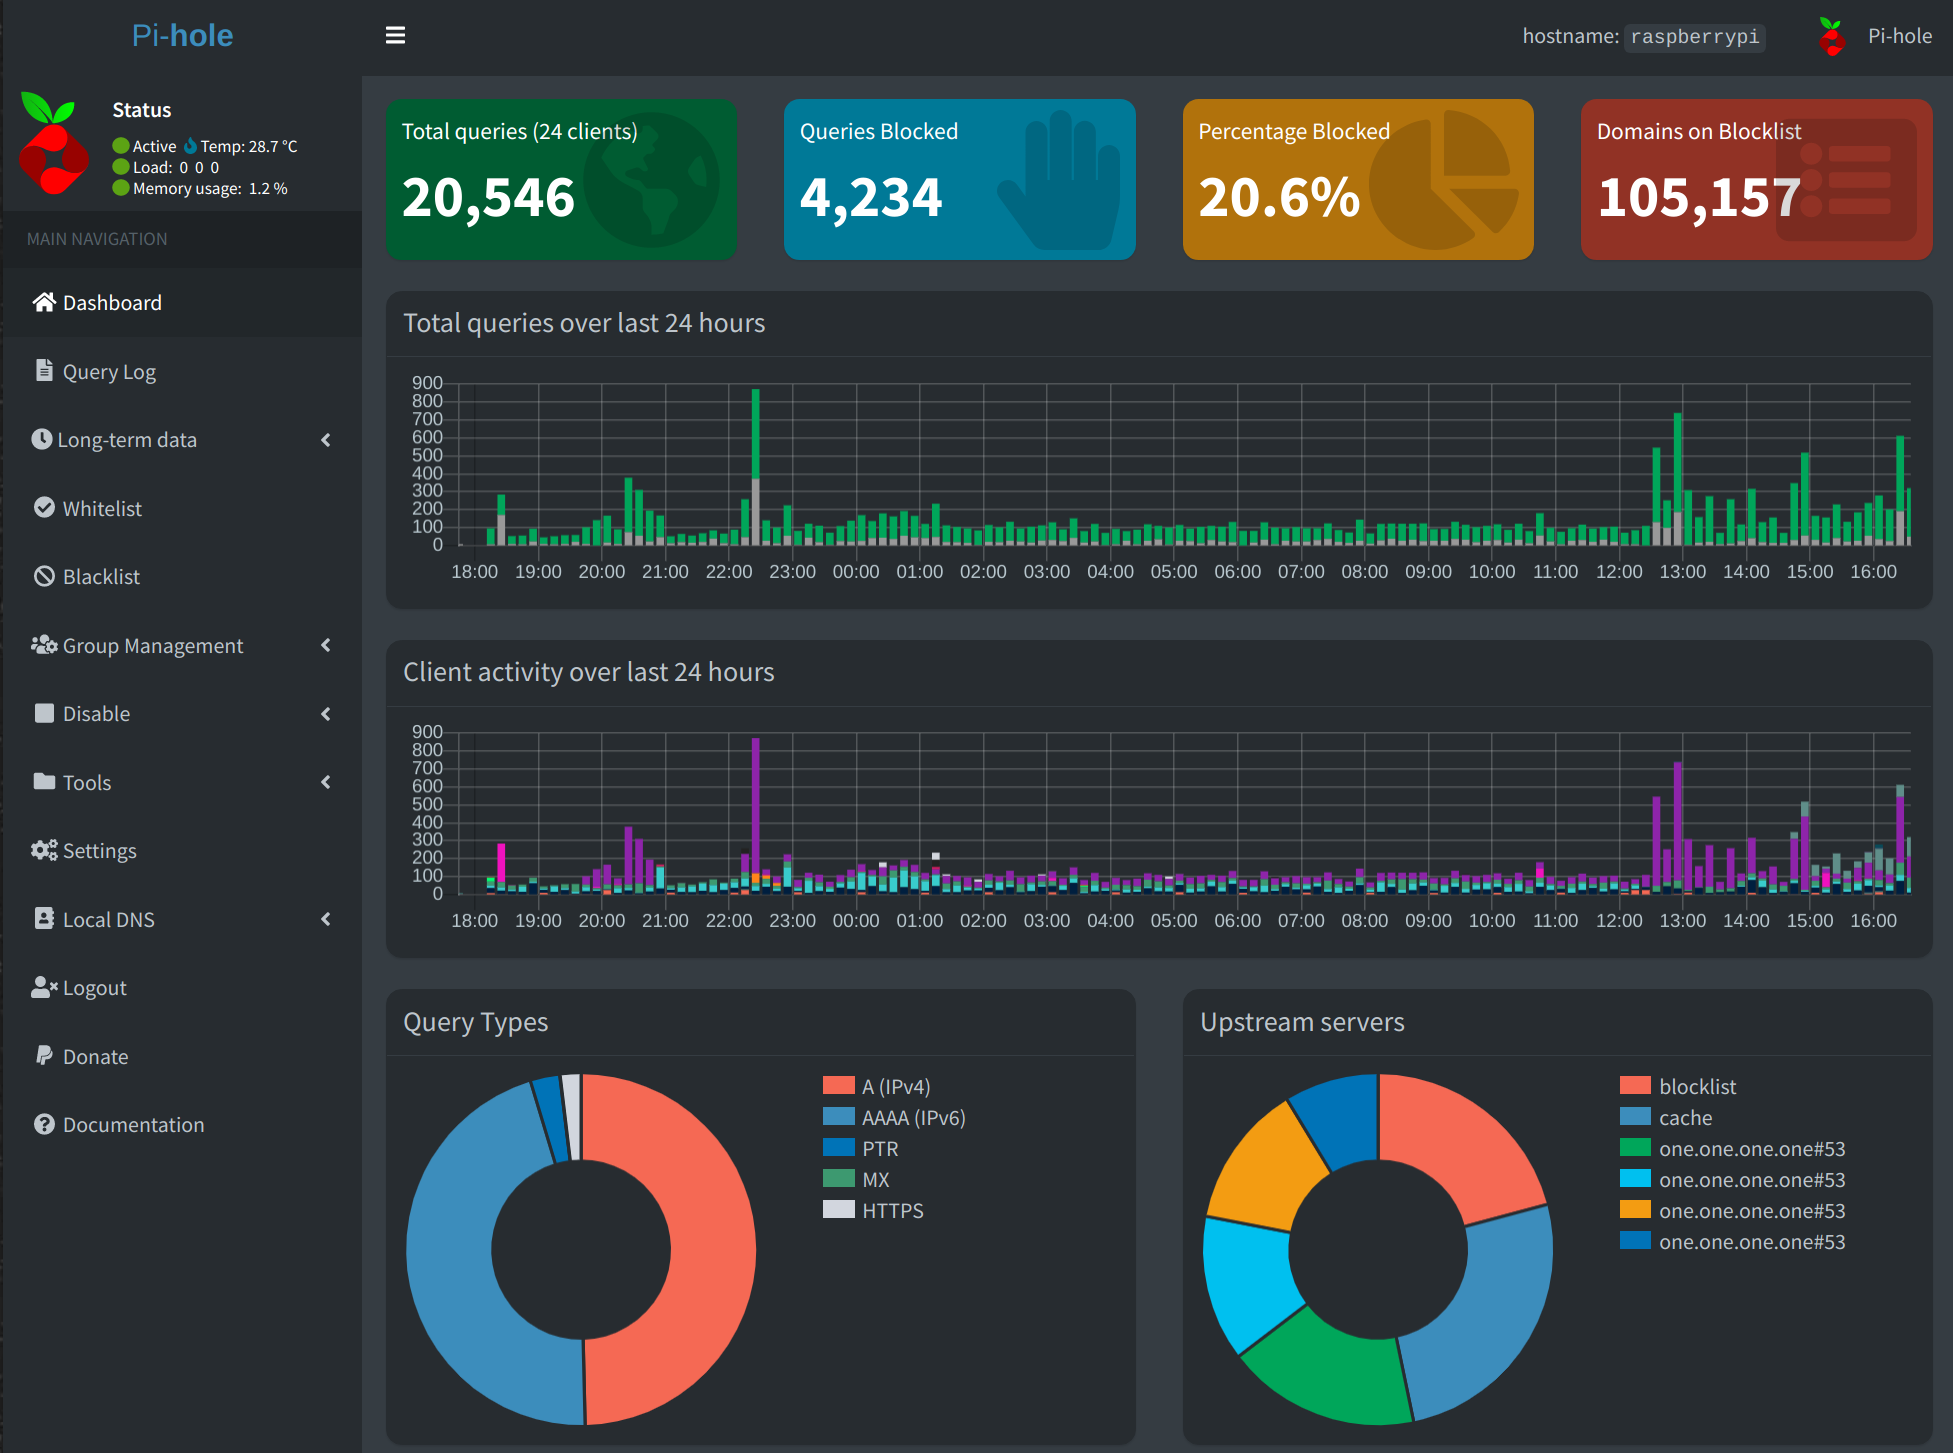
Here is a sample of the included dashboard. This is after running the Pi-hole for around 24 hours.
Stay tuned for possible future posts.
Enable DNSCrypt to create a private and secure intranetAttemp to block ads from Hulu/similar
- ott3r